Our Robot, the Vex Robotics Documentation and Me

In this article, I want to talk about my experience with Vex Robotics itself, building a robot and writing the software for it.
When I first applied for my exchange year at Burnsview Secondary and added Robotics to my selection of classes, I had no idea what you were even supposed to be doing in the class. As it turns out, it’s a class where you build robots (Who could have guessed!) with components, norms, and software supplied by Vex Robotics.
On my first day in class, I joined a team with no clue of what I was even supposed to be doing, and to be honest – I still don’t really know. Since I already had experience programming in Go, node.js and python, I was allocated the role of the programmer.
Vex Robotics has 2 major elements:
- The Physical side of things, including the construction, planning, and layout of the robot and
- The Software side. The Software side consists of 2 basic categories, things:
- the basic control of the robots, e.g., the firing mechanism, the steering, or the control of things like an intake
- the autonomous code which will be run in front of each match where the robot needs to score as many points as possible.
Since this all sounded totally doable, and Vex Code supported Python natively, I decided to go with this option. Alternatively, I could’ve also worked with a scratch like GUI driven programming language which was quite limited, or with C++ using Vex Code Pro. Because I’ve not worked with any C based language before, Python seemed like an obvious choice.
Having made this choice, I went off to scour the internet for Vex Robotic’s official python documentation. But as I soon realized – there was none, the only one I was able to find was for the C++ variant! Amazed by this, I went on to search for any tips on good old reliable Stack Overflow, but even that was of no help. Since that didn’t work, I went on GitHub and searched with this search for any public repository a previous team might have left.
After some searching, I found the choochoochoo repository by Dominic Barter, with an excellent code style from 2019. Perfect! Let’s try if this actually works. Since this code was made for Robot Mesh Studio, I installed their Plugin, copy and pasted the code with some minor adjustments to work with our motor layout. Then the code was built in their web-variant of the software, which at least had some for of documentation. The code was built and put onto the “brain” of our robot and Bada Bing, Bada Boom – Nothing worked.
After much trying around to figure out why it didn’t work, we decided to try to port it over into Vex Code, which sounded perfect. We just forgot about one small issue – the lack of documentation.
Here we arrive at my current stage of progress. I am currently debating on just starting from point 0 and trying to learn C++ so I can work with some actually existing documentation. One of my classmates was fortunately kind enough to let me take a look at their code, amazingly titled “poopooprogramgoodedition”.
Since I don’t want to only rant about the programming side of things, let’s take a look at the hardware side of things.
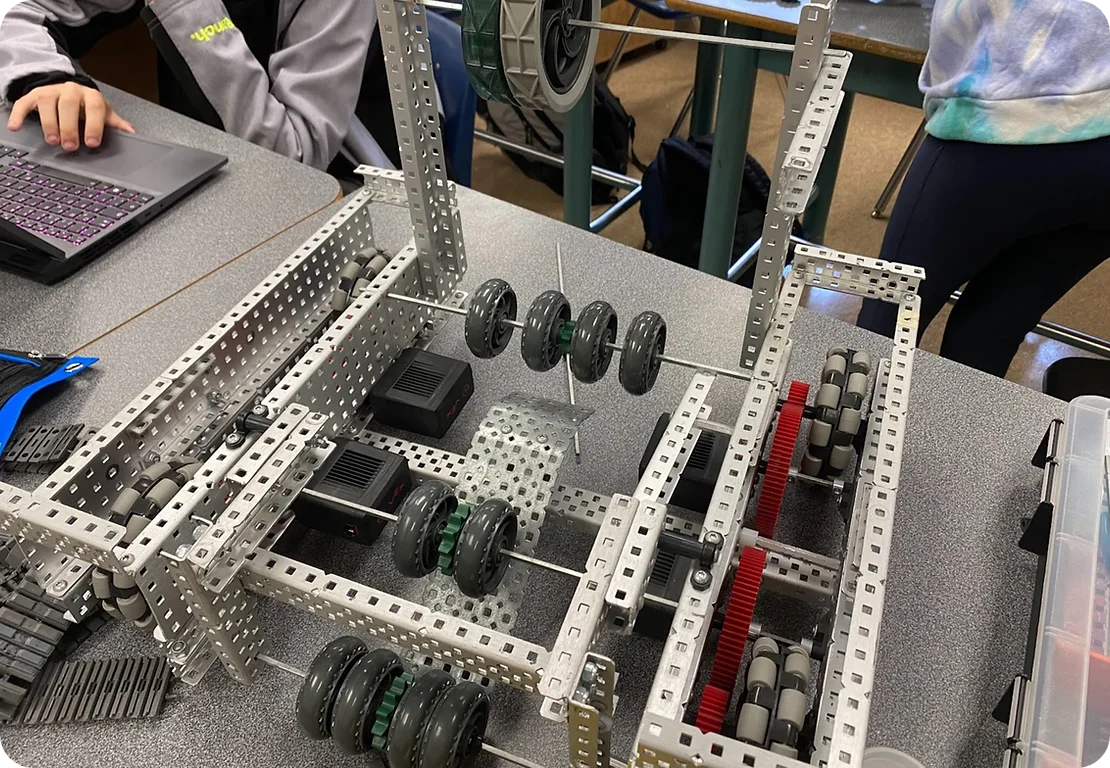
In the picture above, you can see my team’s drivetrain. It’s a basic drive base with 4” omni wheels geared for speed. The motors used have a gear ratio of 84 to 36 to achieve high speeds, since when disks have been fired at the basket, there isn’t a way to get them back.
For the intake we decided to use 2” flex wheels, but since those hadn’t arrived yet, we opted to use 2.75” traction wheels with the outer green parts removed.
Since I’m not too well versed in the mechanical side, I’m going to leave it at this here and recommend you to read my teammate Erika’s blogpost, where she goes into way deeper detail than me.